
|
How do I add a custom column?
Posted by Alexander Artamoshkin (AIT) on 05 August 2014 03:29 PM
|
|
|
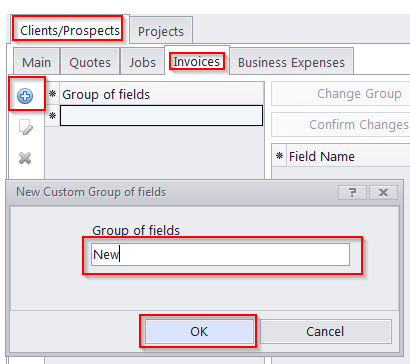
Please do the following: 1. Go to Advanced Settings > Fields in the Backstage View.
2. Select an area where you wish to add a custom field (in this examle, we are adding a new invoice field). Сlick the "Add new group of fields" button. Specify the name for this group and click OK.
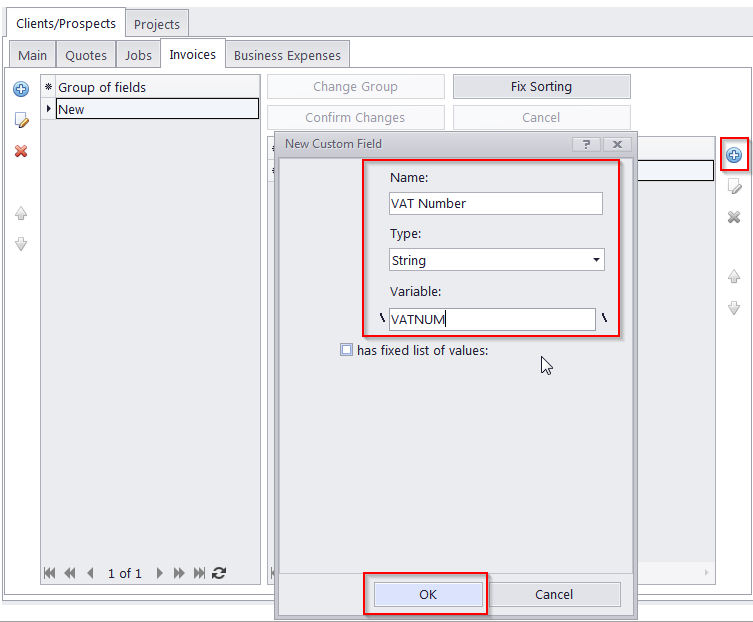
3. Click the "Add new field" button. Specify the name, type, variable , and any other parameters that appear depending on the type. In this example, we are making a text field for a VAT number.
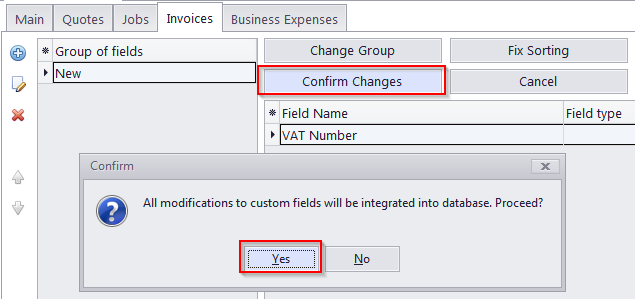
4. Click the "Confirm changes" button and "Yes" to apply the changes to the database.
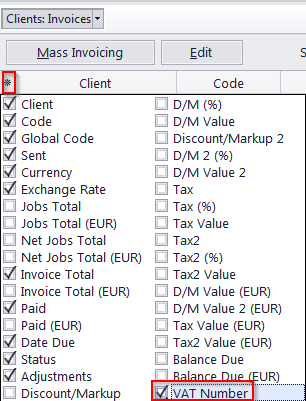
5. In the corresponding table, click the Asterisk in the upper-left corner and check the name of the new column. This will add the column to the table. you can also click and drag the name to chang the position of the column in the table.
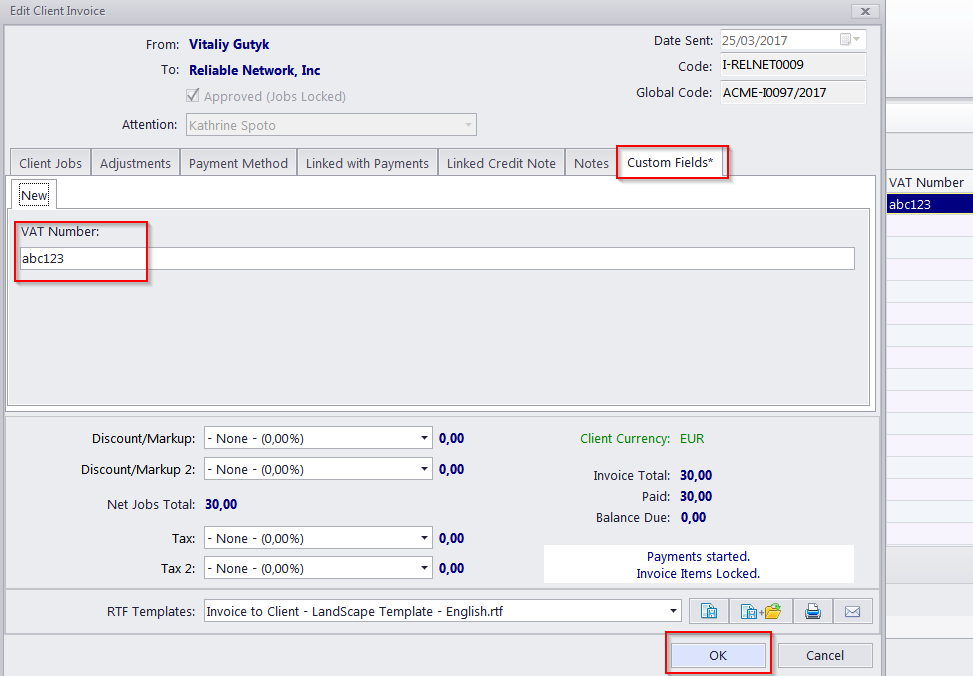
6. Open the appropriate invoice by doubleclicking on it and go to the "Custom Fields" tab. Enter the desired value and Click OK. The new value will be added to the table.
By the way, columns can also be moved by clicking and dragging the column header.
| |
|
|


Privacy Policy | Data Processing Agreement